Generate a spring boot project
In this article, we will take a look at 2 different ways to create a spring boot project with examples and illustrations.
[the_ad id=”651″]
1. Using Spring initializr
Spring provides a pretty convenient way of generating a spring boot project automatically with its spring initializr utility.
Following are the steps that need to be followed
1. Navigate to https://start.spring.io.
2. Select build framework such as Gradle(Groovy or Kotlin), language such as Java, Kotlin or Groovy.
3. Select spring boot version.
4. Fill in the project details such as its name, group, artifact, package, description etc.
5. Select the packaging format of the application executable(jar or war).
6. Select java version on which you want to build the application.
7. Finally select the dependencies that you want to add such as spring web, spring security, spring data jpa etc.
This will add these dependencies to the generated build.gradle or pom.xml files.
Below is an illustration with spring web dependency added.
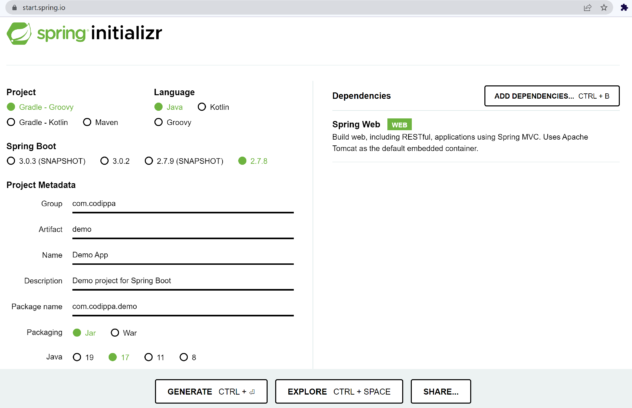
Click on Generate button. It will download a zip, which can be directly imported as a project in any IDE.
[the_ad id=”656″]
2. Using Spring Tool Suite(STS)
Spring Tool Suite is an IDE, built over eclipse and specifically designed to make spring application development easier.
It provides an option to create a spring starter project directly.
With this utility, you can select the same options and add dependencies as with Spring initializr.
Following are the steps:
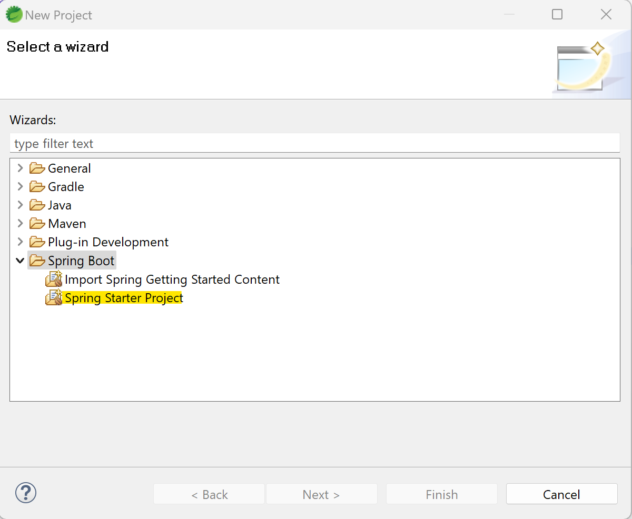
1. Go File -> New -> Project and search for spring. You will see Spring Starter Project option as shown below.
2. In the following window, you will get all the options that were available in spring initializr as shown below.
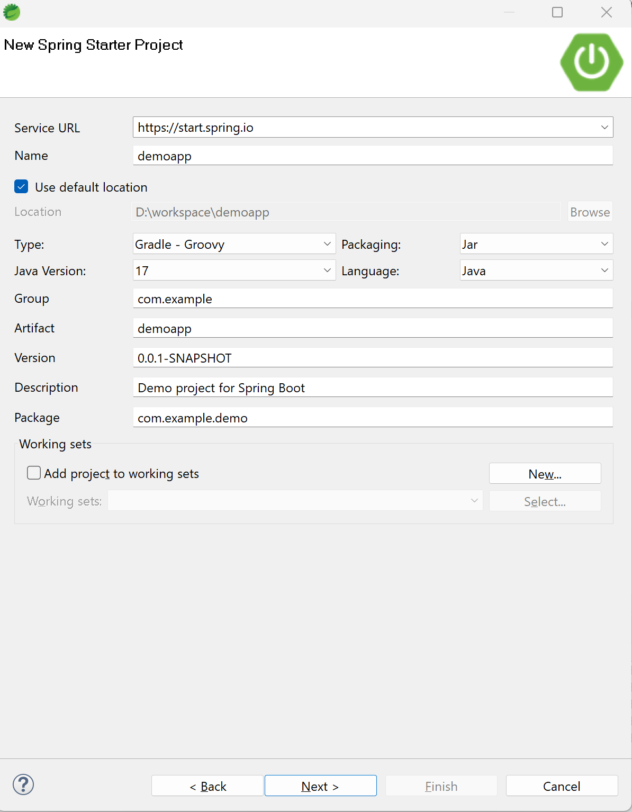
3. Fill in the details and click Next.
In the following window, you get an option to select spring boot version and dependencies as shown below
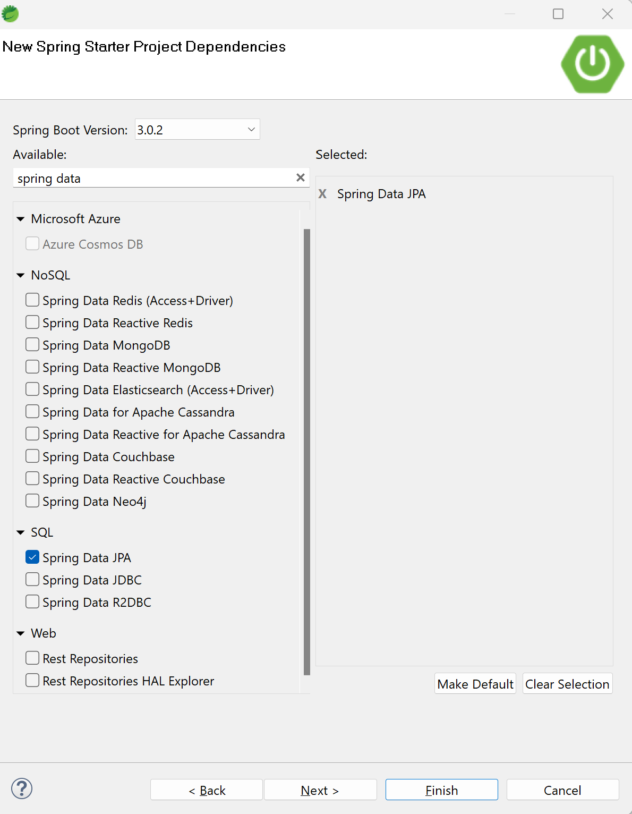
Search the required dependencies and click on checkbox below to add them to your project.
Finally click Finish. It will create the project and start downloading all the selected dependencies.
These are the two ways in which you can create a spring boot project with all the configurations and dependencies.
If you do not want to use any of these options or you have an existing application, which needs to be converted to a spring boot project, then add its dependencies as per the build tool in its configuration file to add them to the classpath.
[the_ad id=”644″]
Hope the article was useful.