Introduction
This article will explain how to configure spring security in an application using Maven and gradle without any customizations.
By the end of this article , you will learn to successfully apply basic Spring security to your Spring boot web application.
What is security?
Security means preventing access of an application to only permitted or registered users while blocking it for everyone else.
Application security can be broken down into 2 different aspects.
1. Authentication
Authentication means checking if the user is a registered user and has the permission to enter the system. Authentication generally is based on a user id and password or an access token.
Common example of authentication is a Gmail or Facebook login.
2. Authorization
Authorization implies checking if the user has access to a particular area of application. Off course you can enter the application but can not access everything.
Example,
you can not see a Facebook post shared with someone’s friends if you are not in his/her friend list. This is because you are not authorized for that.
You can only comment on a blog if you have enough permissions or authorization, and so on.
Spring boot security
Spring boot provides a simple approach to add security to an application.
Just by adding Spring boot security dependencies to the class path, access to the application is secured with one hurdle.
This is called Spring boot security auto configuration.
Following are the benefits of Spring boot security auto configuration.
1. Spring boot web application is protected with a log in page.
2. A user is created with a random password for logging into the application.
Spring boot security configuration
If you have a Spring boot web application Maven project, add spring-boot-starter dependency to the pom.xml file as below
<dependency>
  <groupId>org.springframework.boot</groupId>
  <artifactId>spring-boot-starter-security</artifactId>
  <version>3.1.2</version>
</dependency>
If you have a gradle project, then add the corresponding spring-boot-starter dependency to the build.gradle file.
implementation 'org.springframework.boot:spring-boot-starter-security:3.1.2'
That is all!!
Spring security automatic configuration is done.
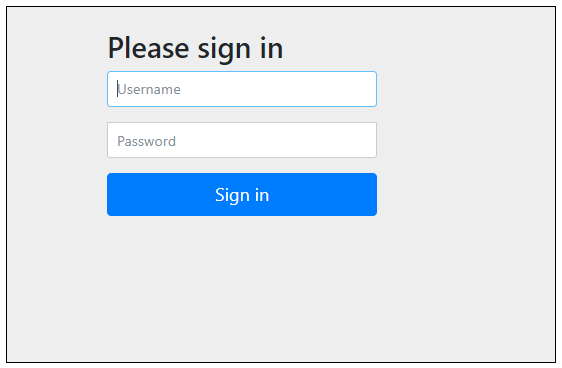
Now when you restart your Spring boot web application, enter application URL in browser such as http://localhost:8080, you will be welcomed with the following page.
 This is a log in page automatically created by Spring boot.
Name of the user which Spring creates by itself is user and the password for automatic configuration is newly created every time the application is started.
To find the password, go to the application startup logs, and look for below line
2020-04-24 22:23:51.358 INFO 14272 — [ main] .s.s.UserDetailsServiceAutoConfiguration :
Using generated security password: 956f97e5-8e7a-4821-ae38-e59354456567
2020-04-24 22:23:53.538 INFO 14272 — [ main] o.s.s.web.DefaultSecurityFilterChain : Creating filter chain
Highlighted text is the password.
Configuring username and password
As seen above, Spring security creates a user and generates a password itself. But this may not be what you want.
You might want to create your own user names with pre-defined passwords and do not want Spring to create one for you.
User names and passwords can be configured. Navigate to application.properties file and create properties for user name and password as below.
spring.security.user.name=admin
spring.security.user.password=1234
These properties are defined by Spring security.
If you can not find application.properties file, create one in the root folder of the application.
Now when the application is restarted, you would not see the automatic password generation message on the console and you can log in with the user id and password given in the properties file.
It is also possible to define user names and password inside application code or fetch it from database using JDBC or JPA.
But that is not a part of default or automatic Spring boot security configuration and will be covered in later articles.