This article will explain what is Spring boot actuator, how it is configured and used to get details about an application using HTTP requests.
Spring boot actuator
Spring boot actuator is used to manage an application by monitoring it. You can check a variety of metrics with it such as
1. Application health.
2. Loaded beans.
3. HTTP requests received and responses sent.
4. Logger configuration.
5. All configured request mappings.
and much more.
All this information can be retrieved by sending HTTP or JMX requests. Endpoints for these requests are already defined by Spring boot actuator and you can also add your custom endpoints in case required.
Further, the endpoints can be secured so that a user with a specific role can access them.
[the_ad id=”651″]
Configuration
Adding actuator to a spring boot application is very easy. Just add the following dependencies as per the build tool to an existing Spring boot project.
GRADLE
compile group: ‘org.springframework.boot’, name: ‘spring-boot-starter-actuator’, version: ‘2.3.3.RELEASE’
MAVEN
<dependency>
<groupId>org.springframework.boot</groupId>
<artifactId>spring-boot-starter-actuator</artifactId>
<version>2.3.3.RELEASE</version>
</dependency>
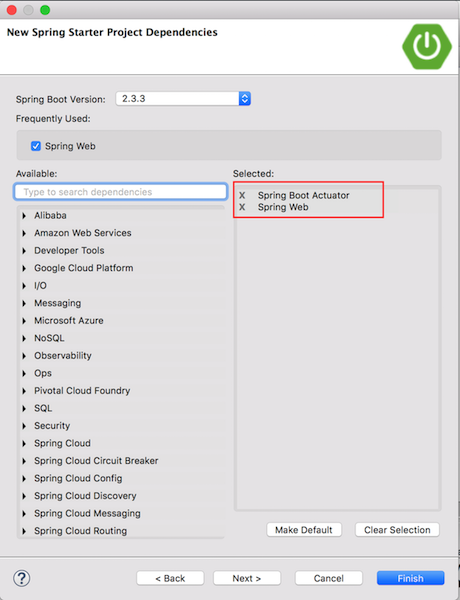
If you are creating a project from scratch in STS, then add Spring Boot Actuator by searching its name as shown below.
Actutator endpoints
An endpoint is one where you send a request to receive or send some information.
In a typical Spring MVC web application, an endpoint corresponds to a controller method usually annotated with @RequestMapping, @GetMapping or @PostMapping annotations.
Spring boot actuator exposes pre-defined endpoints where you can send HTTP or JMX requests and get information about application.
Response received by an HTTP request will be in JSON format.
List of important endpoints exposed by Spring boot actuator along with their descriptions is given below.
| Endpoint ID | Description |
|---|---|
beans |
Displays a complete list of all the Spring beans in your application. |
caches |
Exposes available caches. |
env |
Shows application environment information |
health |
Displays application health information. |
loggers |
Shows the configuration of loggers and modify them. |
mappings |
Displays a list of all request mappings in the application. |
shutdown |
Performs a graceful shutdown of the application. This endpoint is disabled by default. |
threaddump |
Provides a thread dump of application. |
All endpoints should be prefixed with /actuator. Thus, if you are hitting health endpoint, then it should look like
http://localhost:8080/appname/actuator/health
This prefix can be configured using property management.endpoints.web.base-path.
Provide this property in application.properties file as shown below.
management.endpoints.web.base-path = /measure
It should start with a slash(/).
Now, to hit an endpoint, the URL will become http://localhost:8081/appname/measure/health.
If the URL ends with /measure or /actuator, then it will list down all the endpoints that are enabled and exposed.
Below is a sample response
{
  "_links":{
    "self":{
      "href":"http://localhost:8080/actuator",
      "templated":false
    },
    "info":{
      "href":"http://localhost:8080/actuator/info",
      "templated":false
    },
    "env":{
      "href":"http://localhost:8080/actuator/env",
      "templated":false
    },
    "env-toMatch":{
      "href":"http://localhost:8080/actuator/env/{toMatch}",
      "templated":true
    }
  }
}
which shows that the application has two endpoints namely info and env exposed.
[the_ad id=”656″]
Enabling and exposing endpoints
An endpoint can be utilized only when it is both enabled and exposed.
A. Enabling endpoints
All the builtin endpoints except shutdown are enabled by default.
If you want to disable a specific endpoint, then add a property in application.properties file as below
management.endpoint.beans.enabled = false
If you want that all endpoints should be disabled by default and that a specific endpoint should be enabled, then add following properties
# disable all endpoints
management.endpoints.enabled-by-default = false
# enable only beans endpoint
management.endpoint.info.enabled = true
Note that in this case, you need to add a property for all endpoints that need to be enabled.
You can also choose to disable a specific endpoint while keeping others enabled by adding a property as below
# disable only beans endpoint
management.endpoint.beans.enabled = false
# Generic syntax is
management.endpoint.<id>.enabled = false
If an endpoint is disabled, it is removed from the context as if it never existed.
B. Exposing endpoints
All endpoints are not exposed by default meaning that you cannot hit an endpoint and retrieve information unless they are exposed.
If you just add Spring boot actuator dependency and try to access beans endpoint without any extra or default configuration, then you will get below response.
{
  "timestamp":"2020-09-03T12:13:37.105+00:00",
  "status":404,"error":"Not Found",
  "message":"","path":"/measure/beans"
}
To expose all endpoints, add the following property
# enable all web endpoints
management.endpoints.web.exposure.include = *
# enable all jmx endpoints
management.endpoints.jmx.exposure.include = *
To expose specific endpoints, provide their ids separated by a comma, as shown below
# expose all web endpoints
management.endpoints.web.exposure.include = beans, health, info
# expose all jmx endpoints
management.endpoints.jmx.exposure.include = beans, health, info
Likewise, if you want to remove some endpoints from being exposed, then use the following configuration
# expose all web endpoints
management.endpoints.web.exposure.include = *
# do not expose beans, info endpoints for web
management.endpoints.web.exposure.exclude = beans, info
[the_ad id=”644″]
Spring boot actuator examples
Once you add a dependency for Spring boot actuator in your application and start it with below configuration in application.properties file
management.endpoints.web.exposure.include = info,env
which means that only info and env endpoints are exposed.
This is evident from the console logs as well.
2020-09-03 19:29:15.590 INFO 20385 — [ main] o.a.c.c.C.[Tomcat].[localhost].[/] : Initializing Spring embedded WebApplicationContext
2020-09-03 19:29:15.590 INFO 20385 — [ main] w.s.c.ServletWebServerApplicationContext : Root WebApplicationContext: initialization completed in 1103 ms
2020-09-03 19:29:15.904 INFO 20385 — [ main] o.s.s.concurrent.ThreadPoolTaskExecutor : Initializing ExecutorService ‘applicationTaskExecutor’
2020-09-03 19:29:16.118 INFO 20385 — [ main] o.s.b.a.e.web.EndpointLinksResolver : Exposing 2 endpoint(s) beneath base path ‘/actuator’
2020-09-03 19:29:16.166 INFO 20385 — [ main] o.s.b.w.embedded.tomcat.TomcatWebServer : Tomcat started on port(s): 8080 (http) with context path ”
Now, open the browser and hit URL http://localhost:8080/actuator/env and below is the output.
{ "activeProfiles":[
],
"propertySources":[
  {
    "name":"server.ports",
    "properties":{
      "local.server.port":{
      "value":8080
      }
    }
  },
  {
    "name":"systemProperties",
    "properties":{
      "java.vendor.url":{
      "value":"http://java.oracle.com/"
      },
      "user.home":{
      "value":"/Users/renovite"
      },
      "user.language":{
      "value":"en"
      },
      "java.specification.vendor":{
      "value":"Oracle Corporation"
      },
      "java.version.date":{
      "value":"2019-01-15"
      }
    }
  }
]}
There are a bunch of other properties which have been omitted for the sake of clarity.
Configuring Actuator port
By default actuator endpoints listen on the port at which Spring boot web application(or embedded tomcat) starts, which is 8080.
But you can make the actuator endpoints listen on a port different than the tomcat port.
Also, you can change the default port at which tomcat starts using the following properties.
# change default tomcat port
server.port = 9090
# change actuator port
management.server.port = 9091
Creating custom endpoint
If actuator’s inbuilt endpoints do not meet your purpose or you have some specialized requirement or you want to change the format of data returned by them, you can create your own endpoints.
Following are the steps to create a new endpoint.
1. Create a new class. This class should be annotated with @Endpoint annotation.
2. Provide an id attribute to this annotation. This will be the id of the endpoint or the name with which it will be accessed.
3. Create a method in this class. This method should have @ReadOperation annotation.
When the endpoint is accessed, the method with @ReadOperation will be invoked. Thus, this method should return the data that you want to send when the endpoint is accessed.
4. Finally, this class should be a spring bean so it is annotated with @Component annotation.
5. Register this endpoint id in application.properties to enable it as shown below.
management.endpoints.web.exposure.include = info,env,health,getusers
This is required if you did not enable all endpoints using *.
An example custom endpoint is shown below. This endpoint is used to return the names of all logged-in users.
package com.codippa;

import java.util.ArrayList;
import java.util.List;

import org.springframework.boot.actuate.endpoint.annotation.DeleteOperation;
import org.springframework.boot.actuate.endpoint.annotation.Endpoint;
import org.springframework.boot.actuate.endpoint.annotation.ReadOperation;
import org.springframework.boot.actuate.endpoint.annotation.WriteOperation;
import org.springframework.boot.actuate.endpoint.annotation.Selector;
import org.springframework.stereotype.Component;

@Component
@Endpoint(id="getusers")
public class LoggedInUserFinder {

  List<User> users = new ArrayList<>();
  @ReadOperation
  public List<User> getUsers() {
    User userOne = new User();
    userOne.setName("Mark Twain");
    User userTwo = new User();
    userTwo.setName("Robinhood");
    users.add(userOne);
    users.add(userTwo);
    return users;
  }

  @ReadOperation
  public User getUser(@Selector String userName) {
    // return user matching name
    for (User user : users) {
      if(user.getName().equals(userName)) {
        return user;
      }
    }
     return new User();
  }


  @DeleteOperation
  public User removeUser(@Selector String userName) {
    // remove user matching name
    for (User user : users) {
      if(user.getName().equals(userName)) {
        users.remove(user);
        return user;
      }
    }
     return new User();
  }

  @WriteOperation
  public User removeUser(@Selector String userName) {
     // create user with name
     User user = new User();
     // add user
     users.add(user);
  }

  // User model class
  static class User {
    private String name;

    public String getName() {
      return name;
    }

    public void setName(String name) {
      this.name = name;
    }
  }
}
Above code will register an endpoint with id getusers.
In this example, there are two methods annotated with @ReadOperation. One is without any arguments. This will be invoked when the URL http://localhost:8080/actuator/getusers is accessed and will return all users.
Output, when this URL is accessed, is
[
  {"name":"Mark Twain"},
  {"name":"Robinhood"}
]
Note that in a real application, the information about logged-in users will be retrieved from the database or session.
Another @ReadOperation method takes a single argument which is annotated with @Selector. @Selector annotation maps to path variables.
This method will return a single user whose name is given in the URL.
Thus, when the URL is http://localhost:8080/actuator/getusers/Robinhood, then this method will be invoked.
There are a couple of methods with @DeleteOperation and @WriteOperation. These methods correspond to HTTP DELETE and POST requests respectively and are used to remove a user or add a new user.
Customizing inbuild endpoints
It may be the case that you want to change the functionality of an inbuild endpoint such as changing its output. Spring boot actuator allows you to modify its inbuilt endpoints by extending them.
Following are the steps involved:
1. Create a class with @EndpointWebExtension annotation. You can also annotate it with @EndpointExtension.
@EndpointWebExtension is a specialization of @EndpointExtension for web applications.
For JMX, use @EndpointJmxExtension or @EndpointExtension annotation.
2. This annotation should have an endpoint property. Its value should be the class name of the endpoint that you want to extend.
For this example, we will be extending info endpoint, so its value will be InfoEndpoint.class.
3. As with creating a custom endpoint, provide methods annotated with @ReadOperation, @DeleteOperation or @WriteOperation.
Example of extending info endpoint follows.
package com.codippa;

import org.springframework.boot.actuate.endpoint.annotation.ReadOperation;
import org.springframework.boot.actuate.endpoint.web.annotation.EndpointWebExtension;
import org.springframework.boot.actuate.info.InfoEndpoint;
import org.springframework.stereotype.Component;

@Component
@EndpointWebExtension(endpoint=InfoEndpoint.class)
public class EnvEndpointCustomizer {

  @ReadOperation
  public Environment getEnvironmentInfo()
  {
    return new Environment();
  }


  // model class for info output
  class Environment {
    String ram;
    String hdd;
    public String getRam() {
      return ram;
    }
    public void setRam(String ram) {
      this.ram = ram;
    }
    public String getHdd() {
      return hdd;
    }
    public void setHdd(String hdd) {
      this.hdd = hdd;
    }
    // constructor
    public Environment() {
      this.ram = "8GB";
      this.hdd = "500GB";
    }
  }

}
Now when you hit the URL for accessing info endpoint http://localhost:8080/actuator/info, it will output
{"ram":"8GB","hdd":"500GB"}
which is the same object that we sent in response.
This means that we are able to customize inbuilt info endpoint.
[the_ad id=”3385″]
That is all on Spring boot actuator and how to use it. For any questions, do not forget to ask in the comment section below.