Web Server
A web server receives requests and sends a response to those requests. Web server work over Hyper Text Transfer Protocol(HTTP). Thus, the request and response both are transferred over HTTP.
Example, you type a URL in the browser. An HTTP request is sent to the web server of the ip address mapped to that URL and the web server sends an HTTP response in the form of HTML which is understood and displayed by a browser.
The program which sends HTTP request is called client. It can be a browser or a software program. The program which responds to those requests is called server.
HTTP Module
Node.js has a built in HTTP module which enables a node application to receive HTTP requests and respond to them. Thus, if you are building the back end service of an application that will listen to incoming requests, then node’s HTTP module is an important concept for you.
In order to use HTTP module, it needs to be loaded using the require function with “http” as argument as
const http = require(‘http’);
require function in this case returns an object of HTTP module which can be used to call its method.
Creating Web Server
A web server keeps on listening at a particular port. As a request arrives at that port, it sends the configured response.
Node’s HTTP module has a method createServer which is used to create a web server. It takes a function as argument.
This argument function itself has two arguments, first is a request object which contains information about the incoming request and second is a response object which is used to send the response.
createServer returns an object of type http.Server. Calling listen on this object starts a server at the supplied port. Example,
// import HTTP module
const http = require('http');

const server = http.createServer(function(req,res){
        console.log('Request received...');
        // send response
        res.write('Hello World!!!');
        res.end();
});

// start server at port 4000
console.log('Listening on port 4000');
server.listen(4000);
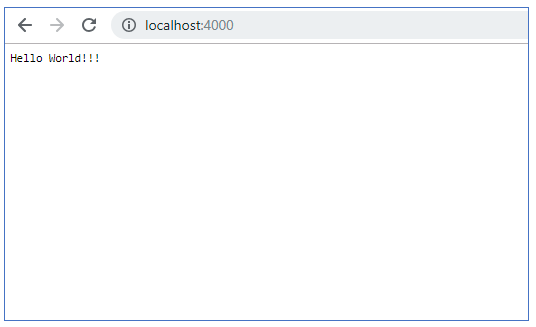
Above program when executed prints Listening on port 4000 and keeps on running. Now, open a browser, type localhost:4000 and hit enter. You will see Request received on the console and browser window will look like.
 You have successfully created a web server listening on port 4000.
Above program will keep on running forever. For stopping it, go to the command prompt and press Ctrl-C
Note that the argument function to createServer method has 2 arguments. Names of these two arguments can be anything. This function can be modified to be an arrow function as below.
const server = http.createServer((req,res) => {
        console.log('Request received...');
        // send response
        res.write('Hello World!!!');
        res.end();
});
write method of response object writes the response body. Its end method signals the server that all the response has been written.
Adding Response Headers
Response headers are used to tell the client about the response such as response type, encoding etc. They are also used to send information about the server such as Server type, time etc.
In the above example, response is written as a text. Suppose you want to send it as HTML, then you need to set Content-Type response header and set it value to text/html to signal the client that the response is of type HTML.
const server = http.createServer((req,res)=> {
        res.writeHead(200, {'Content-Type':'text/html'});
        res.write('Hello World!!!');
        res.end();
});
writeHead method takes two arguments. First is a response code where 200 indicates OK and second argument is an object where key is the header name and value is the value of the header.
Responding for different URL
Above examples sent the same response whatever be the request URL. But this is not the case in a real application. A real world application responds according to the URL of the request. Example,
| URL | Response |
|---|---|
| tutorials.codippa.com | Returns list of all tutorials |
| tutorials.codippa.com/nodejs | Home page of node.js tutorial |
| tutorials.codippa.com/nodejs/modules | Description of Modules under node.js tutorial |
It is also possible to modify our node.js server application to respond differently to different URLs.
The request object has a url property which provides the URL of the incoming request. This property provides everything that is after root URL. Thus, for a URL www.google.com/search/tutorials, the url property will return /search.tutorials.
We can respond to different URLs based on the value of this property as shown below.
const http = require('http');

const server = http.createServer((req,res)=> {
        // localhost:4000
        if(req.url == '/') {
            res.write('Welcome!!!');
        }
        if(req.url == '/courses') {
            // courses URL
            res.write(JSON.stringify(['React', 'Node.js', 'Python']));
        }
        res.end();
});

// start server at port 4000
console.log('Listening on port 4000');
server.listen(4000);
After running the above code, you will receive an array of courses when you hit localhost:4000/courses
Note that we are supplying an array to JSON.stringify method. It converts the object supplied to it in string format which is then written to the response.