What is Routing
A web application is composed of multiple pages where one page is linked to another page. That is, from one page you can navigate to other pages by clicking a link. In older applications, there were anchor tags(<a href="url"></a>) to move from one page to another. When the link was clicked, whole page was reloaded and the requested page was then rendered.
React applications are Single Page Applications(SPAs) where whole page is not refreshed rather only the requested content or it is better to say the requested component is rendered in its respective location.
A new component is loaded when the URL is changed or a link is clicked(which may also cause the URL to change) but whole application is not reloaded. This changing or moving from one component to another is called routing. Example, at the top of Facebook home page, we have links for Home, Find Friends, and Profile. When any of these links is clicked, a new content is loaded and the browser URL also changes but the entire page is not refreshed. On the click of a link, the corresponding component is loaded inside the display area. This is achieved using routing.
How to perform routing
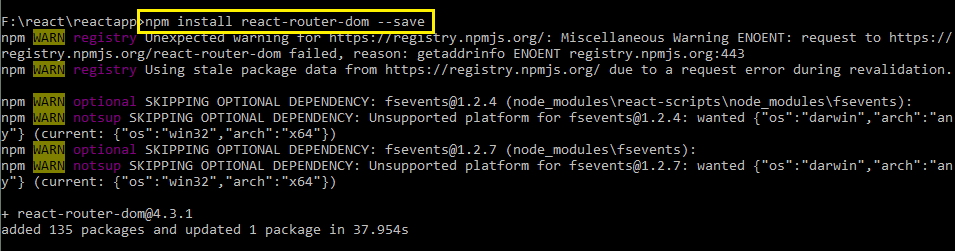
In react, routing is performed by a special package called react-router-dom. Before using react’s routing capabilities, we need to set it up in our application using npm install --save command.
--save flag instructs npm to save the dependency for this module inside the application’s package.json file.
Once the package is installed, we need to use its BrowserRouter and Route objects to perform routing where:
BrowserRouter: It keeps a log of the history of URL changes and decides action to be taken when the URL changes. It interacts with HTML5 history api.
Router: This object is responsible to rendering a component corresponding to the requested URL. It knows which component to render for what URL.
Let us learn about routing with a sample application having three different pages or three components. There is a home page, a page which has HTML content and a page for CSS content.URLs for each of these will be
Home => localhost:3000
HTML => localhost:3000/html
CSS => localhost:3000/css
Next step is to create components for all three above.
HomeComponent
import React, { Component } from 'react';

class Home extends Component {
    render() {
        return (
            <div>Home</div>
        );
    }
}
export default Home;
HTMLComponent
import React, {Component} from 'react';

export class HTML extends Component {
    render (){
        return (<div>This is an HTML component</div>);

    }
}
export default HTML;
CSSComponent
import React, {Component} from 'react';

export class CSS extends Component {
    render (){
        return (<div>This is a CSS component</div>);

    }
}
export default CSS;
Now we need to set up routes. Routes can be considered as the mapping between URL and the component that will be displayed for that URL. A route is created using Route object from react-router-dom package. It has a path attribute that takes the URL for which this route should be matched and a component attribute that takes the component which will be rendered for this route. The URL value should be relative. Thus, routes for the above components for URLs defined earlier will be created below.
These routes are wrapped inside BrowserRouter object which takes care of calling the appropriate Router object as the URL changes. Thus, both the objects created for three different URLs and components are created as below.
<BrowserRouter>
   <div>
      { /* Route for home component */}
      <Route exact path="/" component={Home}></Route>
      { /* Route for html component */}
      <Route path="/html" component={HTML}></Route>
      { /* Route for css component */}
      <Route path="/css" component={CSS}></Route>
   </div>
</BrowserRouter>
Note that Router objects inside BrowserRouter object are surrounded by a div. This is because react expects a single element to be returned from the BrowserRouter. If there is only on route, then this div is not required.
Routing setup in react should also be a component. Thus, besides the above 3 components, we also need to create a component which includes the BrowserRouter and Router objects defined above. This component will be then attached to the DOM and it will take care of rendering all the other three components. Modified index.js is given below.
import React from 'react';
import ReactDOM from 'react-dom';
import { BrowserRouter, Route, Link } from 'react-router-dom';
import Home from './components/home';
import HTML from './components/html';
import CSS from './components/css';

// create router component
function Router() {
    return (
    <BrowserRouter>
        <div>
            { /* Route for home component */}
            <Route exact path="/" component={Home}></Route>
            { /* Route for html component */}
            <Route path="/html" component={HTML}></Route>
            { /* Route for css component */}
            <Route path="/css" component={CSS}></Route>
        </div>
    </BrowserRouter>);
}
// attach router component to DOM
ReactDOM.render(<Router />, document.getElementById('root'));
You can also write BrowserRouter object directly as the first argument to ReactDOM.render method.
Now open the browser and open URLs as defined earlier and see how each component is rendered for corresponding URL.
Notice the exact attribute given in the Router for home component. In the absence of this attribute home component will be rendered for all the URLs because its path(“/”) will be matched for all the URLs(“/html” and “/home”). To ensure that it is rendered only when complete path matches, exact is applied to the Route.
Using Links
Till now we changed components(or views) by changing URL in the browser but this is not is done in actual applications. There we have links for each view. In normal applications, we used the anchor tag but in react applications, this is not the correct way as explained at the start of this section.
In react, we use a Link object from react-router-dom package. It has an attribute named to which takes a URL as its value. This URL should match the one given in the Router objects. Clicking the Link causes the component of the Router whose path matches the URL of Link to be loaded.
A Link can be compared to the anchor tag as clicking it changes the view but without the entire application being reloaded. Thus, the modified Router component with links to each component is given below.
function Router() {
    return (<BrowserRouter>
        <div>
            <div>
                { /*Create links*/ }
                <Link to="/">Home</Link><br/>
                <Link to="/html">HTML</Link><br/>
                <Link to="/css">CSS</Link><br/>
            </div>
            <hr/>
            { /* Route for home component */}
            <Route exact path="/" component={Home}></Route>
            { /* Route for html component */}
            <Route path="/html" component={HTML}></Route>
            { /* Route for css component */}
            <Route path="/css" component={CSS}></Route>
        </div>
    </BrowserRouter>);
}
Notice the to attribute of Link objects and the path attribute of Route objects exactly match.