What is angular routing
A web application generally contains several pages.
Example, a student management system can have a page for student registration, another page for student data modification, a page for viewing a list of all students etc.
Also, each page of the application might have links that point to some other page. Example, student registration page can have a link to another page that displays a list of all students.
When any student name is clicked on the list page, it might open up a new page with the details of that student and so on.
Thus, moving from one page to another is a necessary part of any application. It is also called navigation among pages.
In an angular application, this is achieved by Routing.
For understanding the process of routing, it is necessary to know what is a route, which is covered next.
Route
Route is a URL that points to a specific page of an application. Route will always be a string.
Suppose the root url of a web application is http://localhost/approot
Now, a page for adding user resides at URL http://localhost/approot/adduser
Page for deleting user resides at URL http://localhost/approot/deleteuser
URL for the page showing a list of users is http://localhost/approot/users
URL for the page showing the detail of a specific user is http://localhost/approot/users/user
Routes for all the above URLs are shown below
| URL | Route | Explanation |
|---|---|---|
| http://localhost/approot | ” | Route to the root url is an empty string |
| http://localhost/approot/adduser | ‘adduser’ | Route to a page relative to root URL |
| http://localhost/approot/deleteuser | ‘deleteuser’ | Route to a page relative to root URL |
| http://localhost/approot/users | ‘users’ | Route to a page relative to root URL |
| http://localhost/approot/users/user | ‘users/user’ | Route to a page relative to ‘users’ route |
If a page is relative to the application root URL, then its route may begin with a slash(/) but if a page is inside some other component(such as users/user), then it should not be preceded be a slash(/).
This is because a route is always relative to a component.
Angular routing navigation steps
Routing requires following steps to be performed. These may seem to be confusing at first but when read with the examples which follow, will surely clarify things.
- Creating routes:
Defining the page which should be loaded for a specific route. Example, for ‘adduser’ route, the page for adding users should be displayed. In general, a route will always points to a component or a module. - Registering routes:
Letting angular know about the routes created in above step so that it can load component when it encounters URL matching a route. - Adding router outlet:
First step tells angular to load a component for a particular route or more specifically the HTML template for a component for a route.
But it does not tell where to load that HTML template. This is done by router outlet directive and is represented by a<router-outlet>tag.
The place where angular encounters this tag, it searches for a matching route and loads the HTML of the component which is configured for that route. - Adding links:
This step will only be required when you have a link on a page which points to another page(or route).
Angular routing example
Suppose there is a page having 3 tabs Java, Angular and Python.
On the click of each tab, we want to show items specific to the link clicked in the box below the tabs.
Without routing in place, the contents of app.component.html(also called root component) are as below:
<!-- css for the page -->
<style>
   .list{
      padding: 10px;
      display: flex;
      width: 25%;
      background-color: #ccc;
      font-weight: bold;
   }
   span:nth-child(1) {
      width: 33%;
      padding: 10px;
      cursor: pointer;
   }
   span:nth-child(2) {
      width: 33%;
      padding: 10px;
      cursor: pointer;
   }
   span:nth-child(3) {
      width: 33%;
      padding: 10px;
      cursor: pointer;
   }

   .content{
      background: #ccc;
      width: 26%;
      height: 100px;
      margin-top: 10px;
    }
   a {
      text-decoration: none;
    }
</style>
<div class="container">
   <div class="list">
      <span>JAVA</span>
      <span>ANGULAR</span>
      <span>PYTHON</span>
   </div>
   <div class="content">
       <!-- tab content should be placed here -->
   </div>
</div>
Now each of the three tabs will be a separate angular component.
If you are not familiar with angular components, then it is suggested to first read this.
HTML templates for all the three components namely Java, Angular and Python are given below.
java.component.html
<ul>
   <li>String</li>
   <li>Threads</li>
   <li>Collections</li>
   <li>Exceptions</li>
</ul>
angular.component.html
<ul>
   <li>Components</li>
   <li>Modules</li>
   <li>Services</li>
   <li>Directives</li>
</ul>
python.component.html
<ul>
   <li>List</li>
   <li>Tuple</li>
   <li>Dictionary</li>
   <li>String</li>
</ul>
Creating angular routes
Now we need to create routes for the links so that for each link clicked, its corresponding component is loaded.
Angular routes are created using an array of type Routes which belongs to @angular/router package.
This array contains objects having key-value pairs.
Each route object should contain path and component keys where path represents the route(or URL) which should be matched and component is the name of component which should be loaded when the route matches.
For our example, following route object should be created.
const routes: Routes = [
  { path: '', component: JavaComponent },
  { path: 'angular', component: AngularComponent },
  { path: 'python', component: PythonComponent }
];
This object contains 3 routes for each of the three tab items or components. Each route contains a path which is the URL for which the corresponding component should be loaded.
Note that it is not necessary that tab names should match the path.
Notice the value for path key in the first route is empty. This means that for empty path(or root URL). this component should be loaded.
You will understand it as you progress this tutorial.
Registering Angular Routes
In the first step, we created the routes and the components which should be loaded for that routes.
Till now only a mapping for angular route and component is created but angular does not know which component to load or navigate to, for a particular route.
So, these routes need to be registered in our application so that appropriate components are loaded for corresponding URLs or in other words, these routes need to be registered with Angular router.
Router is configured using RouterModule class from '@angular/router' package.
Routes are registered using its forRoot method which takes an array of route objects which we configured in earlier step.
Also note that routes should always be registered in module and not component class. Thus, updated module will be as below.
import { BrowserModule } from '@angular/platform-browser';
import { NgModule } from '@angular/core';

import { AppComponent } from './app.component';
import { ReactiveFormsModule} from '@angular/forms';
import { JavaComponent } from './java/java.component';
import { PythonComponent } from './python/python.component';
import { AngularComponent } from './angular/angular.component';
import {Routes} from '@angular/router';
import { RouterModule } from '@angular/router';

// array of route objects
const routes: Routes = [
  { path: '', component: JavaComponent },
  { path: 'angular', component: AngularComponent },
  {path: 'python', component: PythonComponent}
];

@NgModule({
  declarations: [
    AppComponent,
    JavaComponent,
    PythonComponent,
    AngularComponent,
  ],
  imports: [
    BrowserModule,
    RouterModule.forRoot(routes)
  ],
  providers: [],
  bootstrap: [AppComponent]
})
export class AppModule { }
All route components(that is, JavaComponent, AngularComponent and PythonComponent) should be added to declarations array of NgModule annotation so that these components are known to the root module.
Adding router outlet
Now when we have configured routes and registered them with application, we need to tell angular where to display the components when a particular route matches.
For this, <router-outlet> tag is used.
This tag will always be used in HTML template of the component. Thus, updated app.component.html will be as shown below.
<!-- css for the page -->
<style>
   .list{
      padding: 10px;
      display: flex;
      width: 25%;
      background-color: #ccc;
      font-weight: bold;
   }
   span:nth-child(1) {
      width: 33%;
      padding: 10px;
      cursor: pointer;
   }
   span:nth-child(2) {
      width: 33%;
      padding: 10px;
      cursor: pointer;
   }
   span:nth-child(3) {
      width: 33%;
      padding: 10px;
      cursor: pointer;
   }

   .content{
      background: #ccc;
      width: 26%;
      height: 100px;
      margin-top: 10px;
    }
   a {
      text-decoration: none;
    }
</style>
<div class="container">
   <div class="list">
      <span><a>JAVA</a></span>
      <span><a>ANGULAR</a></span>
      <span><a>PYTHON</a></span>
   </div>
   <div class="content">
       <!-- location where route component will be displayed -->
       <router-outlet></router-outlet>
   </div>
</div>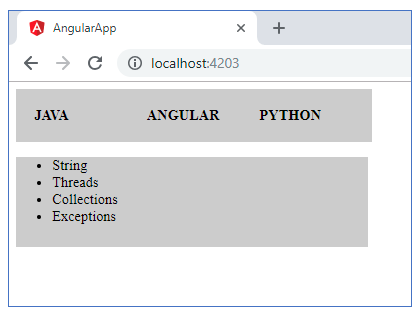
router-outlet is used here since different components will be loaded at the same location based on the current URL.
Since the component to be displayed is decided at run-time, we write a placeholder which tells angular that a dynamic component should be displayed here.
Angular Routing Links
All the above steps are mandatory to set up routing.
After these steps are performed, contents of java.component.html will be displayed on page load as shown below.
This is because for empty route or root URL, we have mapped JavaComponent.
If you want to change the contents of the page below the tabs when a link is clicked, you need to change the contents on the click event. For this purpose, routerLink directive is used.
Value of routerLink directive should match one of the routes configured in component class.
When the element is clicked, the value of its routerLink is matched with a route defined the current module and the corresponding component is loaded in place of router-outlet tag.
This directive is always applied at the element on which the user will click and you need to move to a different page or take some action on that click event and it is always applied in HTML template.
Thus, our HTML template will be modified as below
<div class="container">
   <div class="list">
      <span><a routerLink = "/">JAVA</a></span>
      <span><a routerLink = "angular">ANGULAR</a></span>
      <span><a routerLink = "python">PYTHON</a></span>
   </div>
   <div class="content">
       <!-- location where route component will be displayed -->
       <router-outlet></router-outlet>
   </div>
</div>
Note that the value of routerLink for the element with link JAVA is set to /. This is because for empty route we have chose to load JavaComponent in our routes array.
For non-angular applications, you might have seen href attribute with <a> tag to move to a different page. It can be used here also, but with href attribute the entire page will reload instead of the required portion of the page.
This way, the application will lose the entire essence of angular and its component based nature.
Hope this article helped you to understand the concept of routing in angular.
For a clear understanding, create an example as shown in this article on your own.