Install NumPy in PyCharm
In this article, we will understand how to install NumPy package in PyCharm on Windows operating system step by step.
[the_ad id=”651″]
Following are the steps required to install NumPy on PyCharm:
1. Go to File -> Settings as shown in the image below

Or, you can also press Ctrl + Alt + S keys together.
This will open Settings window as shown below.
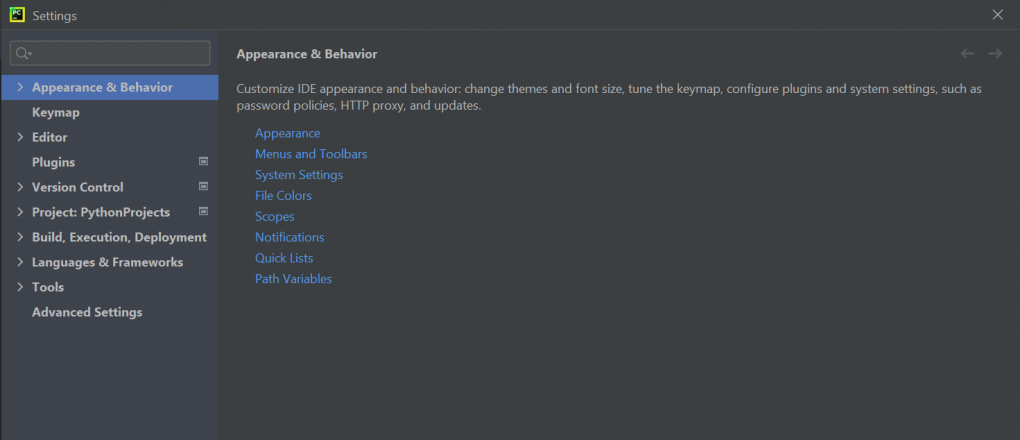
2. Double click on Project: Python Projects in the left menu of Settings window.
Or you can type Python Interpreter in the search box at the top.
3. Click on Python Interpreter option on the right side or inside the expanded menu.
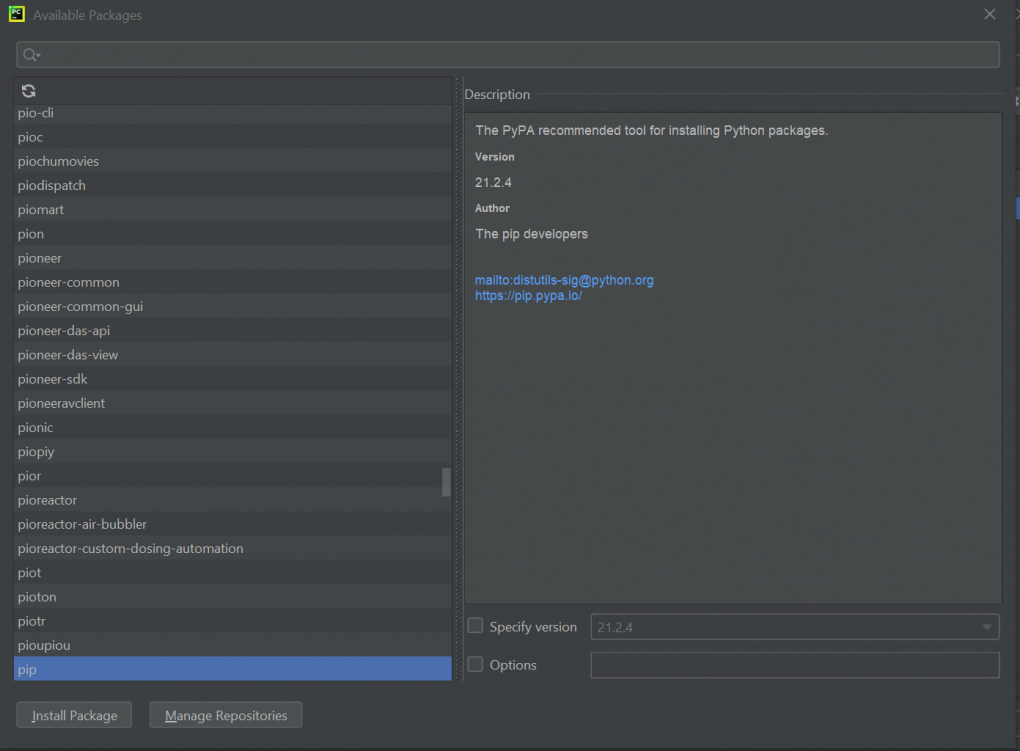
4. On the next window, select the appropriate Python Interpreter by clicking the drop down arrow and click pip option(See highlighted options in below image)
 Selecting Python Interpreter is important, since
 NumPy will be installed for this interpreter and will only be available to programs that use this interpreter.
[the_ad id=”656″]
Double clicking on pip will open below window
5. In the search bar at the top, type numpy and click Install Package button at the bottom.
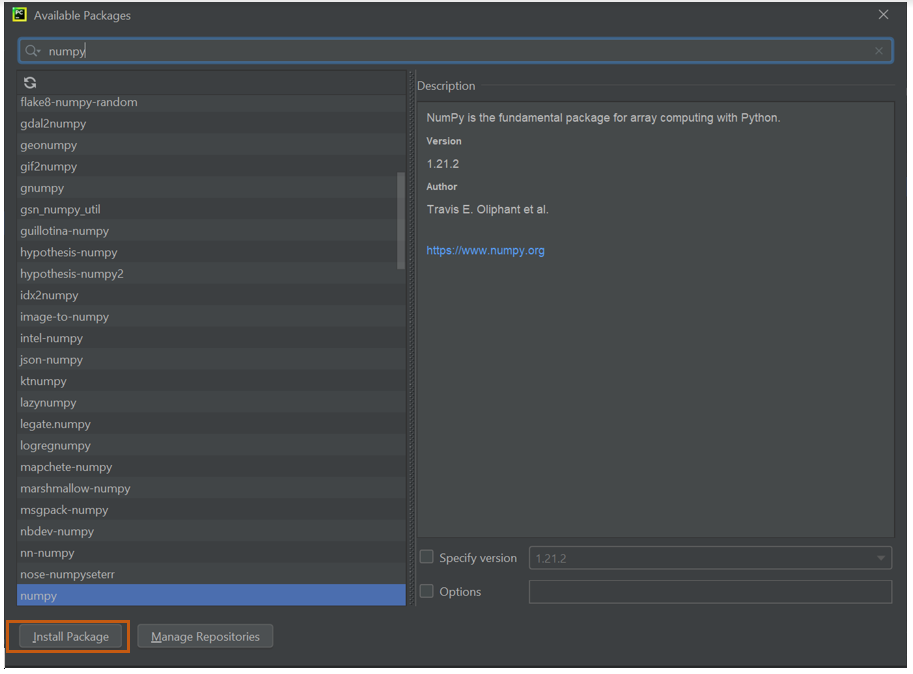
If required, you can select which version to install at the bottom right corner.
This will install NumPy package on PyCharm for selected interpreter. Once installed, a success message will appear at the bottom.
You can now close both the windows.
That is it, NumPy package is installed successfully.
[the_ad id=”644″]
Hope the article was useful.